Welcome to the Getting Starting Article tailored specifically to the Bitfinex Exchange. In the article below, you will find the steps required to generate the API in Bitfinex before then adding it to your Autoview Console.
Granting Permission and enabling the Bitfinex Exchange in Autoview
- Click on the Autoview Extension and go to
 .
. - Click on Permissions on the Left Navigation Bar.
- Grant access to the Bitfinex (beta) Exchange.

- Now click on Bitfinex (Beta) under Exchanges to open the Bitfinex settings and move onto the next step. We will return here once we've generated the API key and API key secret in Bitfinex.
Generating the API key and API key secret in Bitfinex
Now that you are in the Bitfinex Settings in the Autoview Console, you will need to return to your Bitfinex account to obtain the API key and API key secret that will be entered here.
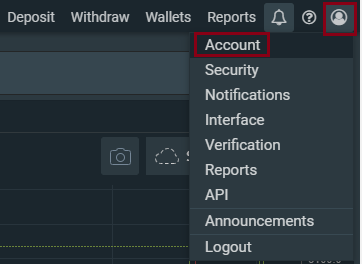
- Once signed back into Bitfinex, click on the top right profile icon and then Account.
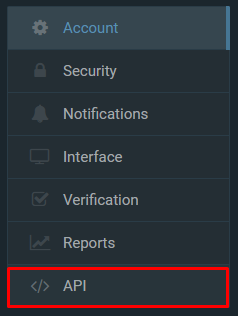
- Click on API
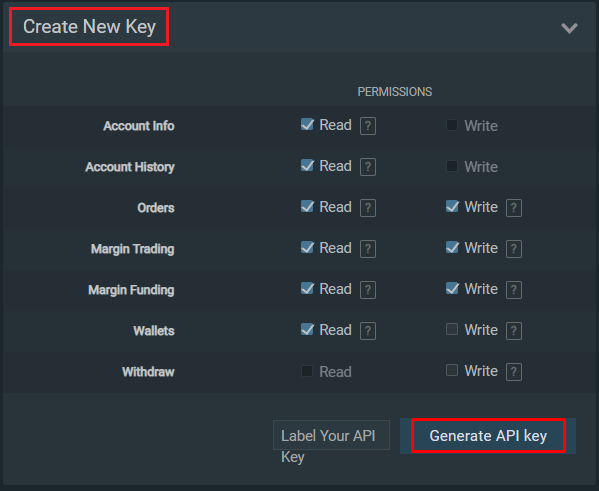
- Click on Create New Key, set your permissions and click on Generate API key.
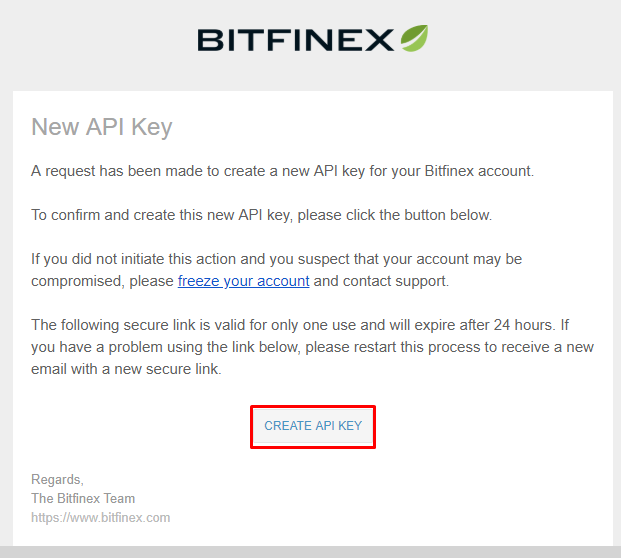
- Once prompted, sign into email account to complete the creation process.

- Open the email and click on CREATE API KEY.
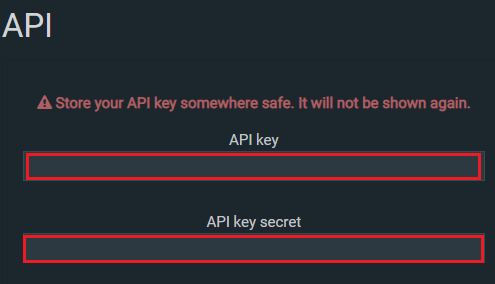
- Copy the API key and API key secret from the page that loads into Autoview.
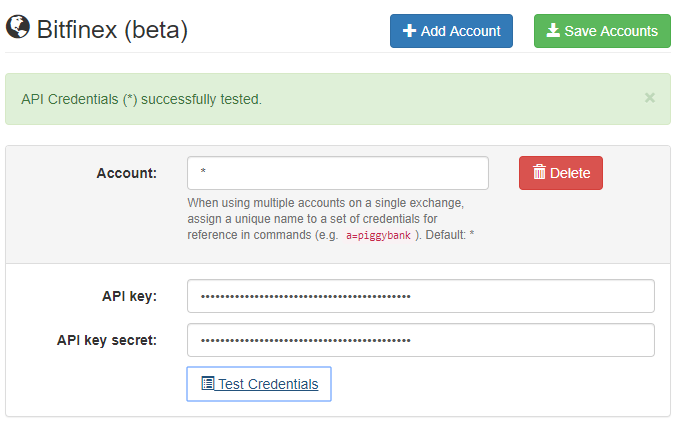
- Once copied, perform a test by clicking Test Credentials. A Green Banner will appear confirming a successful test.
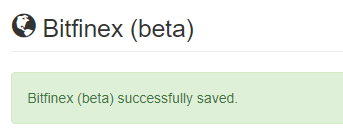
- Finally click Save Accounts in the top right corner of the Autoview Console where another Green Banner confirming the update will appear.
If you would like to now perform your first Test Alert, please refer to the knowledge article titled Testing and Debugging Guide and follow the steps provided.
Comments
0 comments
Please sign in to leave a comment.